---------------------------------------------------------------------------------------------------------------------------------------------------

Friday, May 6, 2016

How to Dry Flowers Using Cat Litter


We sure do love our cats---even if they do cause lots of cat-astrophes around our house! It's always been important to me to teach my children to be gentle with animals. Thanks to some help from Sam's Club, our family was able to donate $100 to the Bella Vista Animal Shelter so animals in our area can receive care while they're waiting for homes.

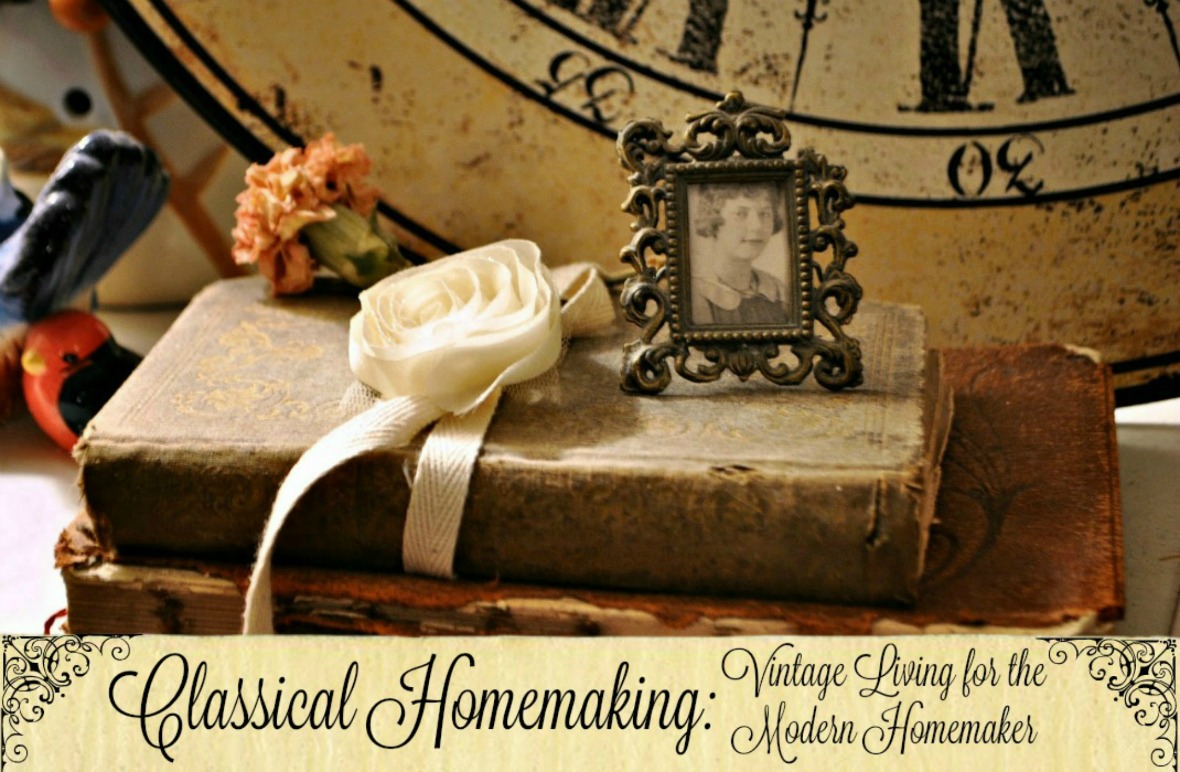
Don't let these two innocents fool you. They may look lean and lazy---but get them indoors and they're terrors! Even though I love cats, I've not had much luck with having them live solely indoors. Three times since I married Jamie 18 years ago, he's attempted to gift me with an indoor kitty; and all three times, the cat has eventually ended up being a mostly outside cat. Maybe I'm feline intolerant or maybe I just get blessed with hyperactive cats but I have very little patience for the curtain-climbing, furniture-clawing, and book-gnawing that goes on with some inside cats. I do much better when I can share a sunny spot with them on the porch---away from my cat-attractive collection of antique books.

A good quality cat litter is important in keeping the litter box area of your home smelling fresh, but did you know cat litter can be useful in lots of other ways that really have nothing to do with your cat? Here are just a few ways you can use cat litter outside the litter box:
  • Place an old book in a container of cat litter and store it for a few days to remove musty smells.
  • Mix cat litter with potting soil for more even water distribution around your plants.
  • Sprinkle litter in the bottom of trash cans to deodorize them.
  • Use litter instead of rice, beans, or sand when filling crafts or bean bags.
  • Deodorize your refrigerator with a bowl of litter on a shelf.
Did you know you can also use it to dry flowers? I love to use dried flowers and other plants in crafts and drying them with cat litter is simple and can be done quickly. Here's how I make a dried flower bookmark using an easy drying technique:
Begin with a flower or plant that can be flattened. Pansies and daisies are great choices, as well as clovers. 

Next, find an airtight container large enough to fit the flowers and add at least an inch of cat litter. Lay the flowers in the container and cover them with a light layer of cat litter. Close the lid and keep the container in a dark closet for 3-5 days. For thick flowers like roses, it may take a few days longer. 

Once the flower is dried, begin creating the bookmark. I like to start with a pretty piece of scrapbooking paper and stamp or glue on words or quotes that inspire me. I buy secondhand copies of my favorite books so I can cut out bits of the book pages to add. {I acknowledge this completely enrages some people.} 

Then I apply a thin layer of glue from a glue stick in the area I plan to add the flower. I press it down carefully, starting with the center of the flower and then gently pressing the petals and stem.
When the glue dries, I cover the bookmark with clear packing tape. Sometimes I lay the bookmark between two sheets of clear contact paper, press down, and cut around the edges. 

Then I use a hole punch to add a hole for a pretty ribbon. Use a match to melt the ends of the ribbon so it won't fray. This is a pretty way to preserve a flower from a special day and makes a great gift, as well.

My cats may not have direct access to my books very often, but that doesn't mean they can't still enjoy great literature. My little readers love to entertain their feline (and canine!) friends with their favorite stories---outside.

Wednesday, May 4, 2016

A Big Kid in Training and DG Digital Coupons #PottyTrainingTips #DGCoupons #PullUpsPersonality #ad

I can't believe our youngest is in Pull-Ups® already! I'm at sort of a difficult place in my mothering as there hasn't been a new baby for three years and Brenna is breaking out of all the baby and toddler stages as fast as she can. I'm proud of my little big kid in training---but it's a bittersweet time, too!
Brenna turned three in December and, like all my other girls, she's been slower than her brothers to completely potty train. That's fine with me though---I've found that it's much less stressful on both of us if I just encourage her and wait it out. She loves wearing Pull-Ups® Training Pants because they help her feel independent and aid her in learning how to do this next big girl thing on her own.

Now that the weather is nice, our family has been hanging out more at the parks and hiking trails in our town.  It's nice that I'm not dealing with baby diapers when we want to get ready for a trip quickly. Brenna can pack the diaper bag on her own and this makes her feel like she's done a big kid chore just like her older siblings.

I found Pull-Ups at Dollar General last week and saved $2.00 with a digital coupon. Have you tried Dollar General's digital coupons? It was my first time and it was super easy! For a limited time, you can save $2.00 also on Pull-Ups® Training Pants.

To sign up for DG Digital Coupons:
1. Sign up here---> https://ooh.li/117fee5 or Text JOIN to 34898.
2. Create an account and load the coupons you want.
3. Shop Dollar General to redeem the coupons at checkout. Check out their store locator to find your nearest location.

After you've signed up for all the coupons you want to use, you're ready to shop. At check out, just enter the phone number you signed up with and your digital coupons will automatically be deducted from your total. No printing required!

Pull-Ups® help Brenna feel comfortable and confident as she grows through this newest stage. Because they look and feel more like real underwear, she can pull them on and off herself so she's gained some independence. Here she is with Daddy at her first real baseball game. With our big family, we can play a "real" game all on our own.

Of course she hit a home run and everyone cheered as she ran around the bases!

After our baseball game, we had a picnic and took a hike around Tanyard Creek park. Brenna was still going strong with no accidents---yay!

This little sweetie is full of personality and fun. Do you have a potty-training child? Check out this fun quiz to see what their potty training personality is. You can also visit the Pull-Ups® site for some potty training games to play with your little big kid!

Tuesday, May 3, 2016

Summer Spoolie Swap 2016

Welcome to The Homemaking Party! It's been forever since I've been crafty, but this week I think I'm ready to jump back into creativity! My teens have a homeschool formal this weekend and Lynzie wants a dress just like the one from the new Cinderella movie. So...I designed and drafted it and am about half way done sewing it. Whew! I'm up to my tiara in organza, satin, and tulle!

A reader friend reminded me a couple days ago that we're overdue for another spoolie swap! So, I've put together a summer-themed one. It will be our first summer swap as all the others have been done in the spring. I hope you'll join in and invite your friends to, as well.

So what is a spoolie? Basically, it's a prettily decorated wooden spool that can be used as a base for any kind of little scene---big or small! Click on over to a previous year's reveal post for more ideas.

It's super easy to join the Spring Spoolie Swap. Just follow these steps:

*Send your name, mailing address, and blog address to sarah@classicalhomemaking.com. (You don't have to have a blog to participate.)

*Please place the swap button on your blog somewhere so your friends can join in too!

*Partners will be assigned on May 27th. Please send your gift package by June 15th.

*Reveal party (blog posts) will be held July 5th. (Participation is optional.)

*Spools must be wooden. Don't have a spool? Shop Etsy for some inexpensive ones!

*I know some of you are new to bloggy swaps so please feel free to ask me any questions!

{*swap is open to US mailing addresses only*}


Classical Homemaking
Linking with:

Friday, April 29, 2016

Caramel Mocha Turtle Cookies #Folgers #ad

This is a sponsored post written by me on behalf of Folgers for IZEA. All opinions are 100% mine.
In this family, we love our coffee. Some prefer to add milk, cream, and flavorings---others are fine with having it black. One thing we all agree on is that our coffee must have a rich flavor and be easily accessible. For days when there's just not time for the prep and clean up involved with brewed coffee, we can enjoy Folgers Instant Coffee and have our coffee in an instant.
One of my favorite comfort rituals is making a hot drink and a small snack to enjoy while I read. I love the taste of coffee and chocolate together and Folgers Instant Coffee quickly provides that rich flavor I crave. Last week, I made these Caramel Mocha Turtle Cookies---the perfect sweet treat to enjoy with a hot cup of Folgers Instant Coffee. Check out my recipe below. 
Have you ever added instant coffee to your baking mix? One tablespoon of granules gives a bold flavor to cakes, brownies, bread, and cookies. 
I began with a simple chocolate cookie recipe, adding in 1 TB of the Folgers Instant Coffee granules. I love this recipe because the cookies are crisp on the edges and chewy in the middle---perfect! To get that crispy/chewy texture, make sure to chill the dough one hour before baking it. This will keep them from spreading too much and will help you achieve the perfect cookie.
Next, I melted a bag of unwrapped caramels, mixed with 2 TB of heavy cream. I like to use a double boiler for this job, but you can melt them in the microwave, too, as long as you stir them often.
Finally, I drizzled the caramel over the cookies (very messily!) and sprinkled on some chopped pecans. The caramel cooled quickly and the cookies were ready to enjoy in minutes.
Not only can I enjoy rich, hot Folgers Instant Coffee in an instant, but having a scrumptious treat on hand, like these Caramel Mocha Turtle Cookies, makes for a sweet relaxing time in the midst of a busy day.
Caramel Mocha Turtle Cookies
1 c. flour
¼ c. unsweetened baking cocoa
1 TB instant coffee granules
1 tsp. baking soda
¼ tsp. salt
½ c. butter, softened
½ c. brown sugar
¼ c. sugar
1 egg
1½ tsp. vanilla extract
11 oz. bag caramels, unwrapped
2 TB heavy cream
1 c. chopped pecans

Preheat oven to 350º. Mix the flour, cocoa, coffee, soda, and salt in a bowl and set aside. Using a mixer, mix the butter, sugars, egg, and vanilla. Stir in the dry ingredients. Cover dough and chill one hour. Scoop dough onto a prepared cookie sheet (I like parchment paper best for these) and bake 8-10 minutes. The middle of the cookie should look slightly under-baked. Let them cool completely on a wire rack before topping. When you're ready for the topping, chop the pecans and set aside. Then melt the caramels and cream, stirring until smooth. Drizzle the caramel over the cookies and immediately sprinkle on the pecans. The caramel will cool and firm up quickly.

How do you enjoy Folgers Instant Coffee? Do you make a cup to drink while more coffee is brewing or keep it on hand for an afternoon one-cup treat? Let me know in the comments below and be sure to check out these Folgers recipes.
Visit Sponsors Site

Wednesday, April 27, 2016

Spring Comes to NW Arkansas

Good Morning! Spring has sprung in the South---as evidenced by our super humid week so far and 1:00 am tornado warning last night! Whew! Thankfully, everyone in our area is safe---even if a little sleepy!

I hope everyone is having a beautiful week! Thanks for stopping by The Homemaking Party!

Sunday, April 24, 2016

Homemade Chicken & Noodles {Chicken & Dumplings} --- Frugal Family Recipe

There are a few things that will always remind me of Leo Coller. One of them is homemade chicken noodle soup. My husband has always raved about his dad's homemade chicken and noodles and it doesn't matter how many variations I come up with, I never have made it, "just like Dad's". Still, this recipe gets lots of compliments around our table, even from Jamie, so I suppose I'll have to just let his Dad be the chicken noodle king and I'll live happily in his shadow!

Before I give you my recipe, here are a few tips concerning the preparation of this delicious comfort food:

The process of making this homemade soup is actually very simple, but the fact that it's all homemade makes me feel all Ma Ingalls-ish. It's a great low-cost recipe that feeds a large family. I suggest grabbing several of these whole chickens when you find them on sale and just storing them in the freezer. Sometimes you can get them for as low as .60 a pound---which would make your whole meal cost less than $5 for about 12-15 servings.

Do you have a pastry blender? I suggest purchasing one. I use mine all the time for biscuits and other easy bread recipes. Any time a recipe says "cut in butter using two knives", use a pastry blender instead. You'll save time and serious annoyance. {I'd love to hear from someone who has successfully turned this mixture to "pea-sized crumbs" using two knives. I've got to know your trick!}

I never worry about cutting uniform noodles. I just roll out the dough to about 1/4" and cut through it quickly with a pizza cutter. Super easy!

De-boning the whole chicken will give you enough meat for 12-15 servings. Some people only use white meat in their chicken noodle soup, but I say, "bring on the dark meat!" If you really must only use white meat, stick the rest of the bird in a large freezer bag and store it for making homemade chicken stock or broth later on.

Here's my recipe for Homemade Chicken & Noodles. Let me know if you give it a try!

Homemade Chicken & Noodles

1 whole chicken
3 1/4 c. flour
2 tsp. salt
6 TB butter
3 TB chicken bouillon 
2 c. milk

salt and pepper, to taste 

Put the chicken in a large stock pot and cover completely with water. Bring to a boil, then continue cooking chicken for one hour, or until cooked through. I like to turn it over now and then, and poke it with a fork to make sure it's getting done all the way through. When cooked, remove the chicken to a platter to cool.

While chicken is cooking, make the noodles. Start with 2 c. of flour in the bowl. Add 2 tsp. salt and 4 TB of butter. Use a pastry blender to mix it up until it's the size of small peas. Add 1 cup HOT water and and 1 1/4 c. of flour to the mixture. Stir and work the mixture until a soft dough ball forms then break off about a third and roll it out to about 1/4" on a floured surface. Cut the dough into strips using a pizza cutter. If the chicken is done at this point, remove the chicken and begin adding the noodles, one at a time, to the still boiling water. If the chicken is still cooking, layer the noodles on wax paper and continue rolling them out. They'll be fine on the counter for awhile until the chicken is done.

Before adding the noodles to the pot, add the bouillon and salt and pepper to taste. Then, drop the noodles, one at a time, into the boiling water. Add 2 TB butter and continue cooking. Whenever the chicken is done, add it in, too. Continue cooking until noodles have been boiling for at least 15 minutes. Then, add the milk, turn off the burner, cover the pot, and let it sit for about 1 hour. {Don't forget to taste the broth before serving to make sure it's just right!}


Thursday, April 21, 2016

DIY Homemade Cinnamon & Clove Toothpaste --- Guest Post

I'm so excited to welcome my friend Audra as a guest blogger today! Audra is the one who encouraged me to start blogging so long ago. Thank you, friend! Check out her blog at audrasilva.com.

I had ‘make toothpaste’ on my to-do list for quite a while, but never seemed to get around to it. When Sarah asked for guest bloggers, I knew it was time to tackle this mini DIY project, at last. There were two recipes that stood out to me with ingredients I wanted in my own recipe, so in typical Audra style, I decided to create my own, pulling from these.
The first one was written by a dentist, and I cannot remember where I originally found it. I know it had baking soda, Xylitol, and food-grade peroxide. I chose to pull the Xylitol from his recipe.
The second one is what I used for the base of my own recipe. You can find the original ingredients and instructions at the Bulk Herb Store.
Here’s a quick breakdown on why I chose these ingredients (ignore the heart in the photo as I accidentally grabbed a jar left from a previous recipe)…
Xylitol is not only sweet in taste, but it also helps reduce plaque and tooth decay. In some cases, it may even reverse decay. Warning: it is toxic to dogs, so be careful if you have fur babies.
Cinnamon (not what you find in the supermarket) is an antioxidant and has anti-inflammatory properties. It also fights bacterial and fungal infections. Plus, it has a nice flavor.

Cloves have the following properties: analgesic, anesthetic, anti-inflammatory, and anti-bacterial. Have a toothache? Check out this article on dental care and the benefits of cloves. Cloves freshen breath and leave your mouth feeling clean.
Baking Soda is a natural choice for whitening teeth, freshening breath, and scrubbing away tartar.
Sea salt has wonderful trace elements and minerals and is great for strengthening gums, fighting tartar and bad breath, and whitening teeth. It also causes your mouth to water more, and your saliva has anti-bacterial properties that protect your enamel. Cool huh?!

Bentonite Clay absorbs toxins, allowing them to be carried out of the body (in this case when you spit out the toothpaste). It also has re-mineralizing properties and gently scrubs your teeth.
Activated Charcoal whitens teeth, helps fight gum disease and prevent cavities, and absorbs toxins allowing them to be carried out of the body (when you spit out the toothpaste).
Caution: Bentonite Clay absorbs particles from metal and toxins from plastic, so use glass bowls and wooden spoons when working with it.
A couple of things to note: when I first made this, I added about ¾ tsp. of sea salt. It’s too salty for me. When I remake this recipe, I will only add a pinch of sea salt, which is what my recipe now reflects. You’re welcome.
Also, when you combine these ingredients, the end result is a green/gray paste that looks like something you’d smear on your face as a mask. I would advise against that as the Cinnamon might irritate, but I thought I’d warn you. It isn’t a ‘pretty’ toothpaste. You can make a pretty label for your jar instead. Smile.
Also, the paste is a thinner consistency than store bought toothpaste so I use a decent amount. I expect it might thicken over time, however, which is why I kept mine on the moist side. Nowhere does it say to refrigerate, but I’ll probably put my main jars in the fridge and store a small jar of toothpaste in my bathroom. Just personal preference for me.
Now, without further ado, here is the recipe:

Have you made your own toothpaste yet? Interested in giving it a go? For more tooth care goodness, check out Three Toothy Tips over on Simply Audra Marie.
Now, go forth and show those pearly whites (well, the white part might take some time).
Disclaimer: I am not a dentist nor do I play one on TV. I’m a mom who has researched, experimented and drawn conclusions. These I share with you in the form of a recipe designed to encourage healthy teeth and gums. Use at your own risk, and definitely do some research as you decide if this is something you want to try. 
Affiliate Links: This post contains affiliate links. These are products and/or companies I have personally used and recommend. It doesn’t cost you to use my links, but it does help me with the cost of blogging. Thank you.

Tuesday, April 19, 2016

In Which Mom and the Littles Take a Road Trip


Welcome to the Homemaking Party! A couple weeks ago, I mentioned I had a secret. Well, instead of coming to you from my home here in NW Arkansas, I was actually writing you all from a motel in eastern Colorado! Liam, Kynthia, Brenna, and I made an 8-day, 4,000 mile road trip to Oregon and Utah to see most of my family and some of Jamie's. I didn't want to tell anyone until I got home since Lynzie and Michael were home with the other kids during the days while Jamie was working. It was a great trip---but exhausting! The kids did great---but I don't think I'll be up for that again any time soon. Ha! This picture is our first day on the road in central Kansas.


Here we are the second day in Wyoming. Ha!! We found snow!


The second night, the kids were getting pretty homesick so we Skyped with the family back home.

Once we got to Oregon, things got easier as the kids were distracted by family and fun. Here they are with a whole bunch of cousins they met for the first time!

After a few days in Oregon, we went on to Utah to meet new baby Sammy, my first nephew. My brother and sister in law took us to Ashton Gardens at Thanksgiving Point in Lehi, Utah. The kids loved feeding the Koi and seeing all the gorgeous landscaping. My favorite part was the Secret Garden---complete with wooden doors and a pretty fountain. 

On the way home, GPS took us through all the neat landscape of northern Utah and the Colorado Rockies. I'd never been through any of these places before so it was super neat to see it all!

We were beyond relieved to be home, though. We're a pretty tightly-knit family and it's hard separating and going our different ways. We celebrated Saturday with a trip to a baseball park here in town, as well as a picnic and a hike. More on that later!

Thanks for stopping by the Homemaking Party! I'm excited to see what you've got to share!

Related Posts Plugin for WordPress, Blogger...